Introduction to GWT 2.1 MVP
In this article I will try to cover the highlights of the built-in GWT MVP framework. As example is used a small application built using this approach.
This article is free treatise (GWT MVP Development) and the uniqueness of the approach in no way claims. If anyone is interested in this rather big introduction
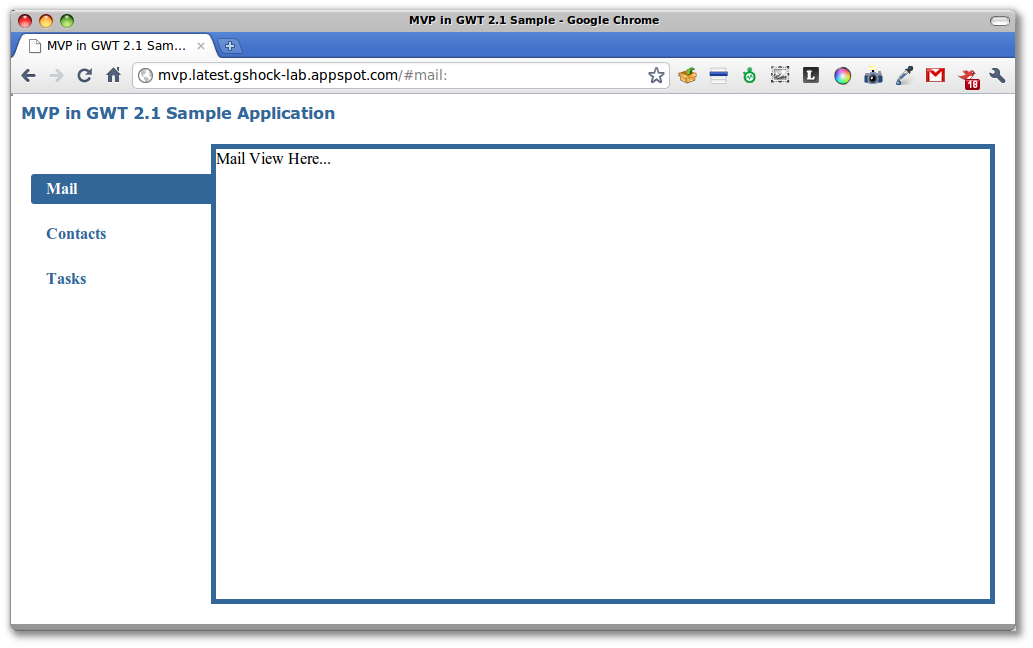
I have to say that I'm not going to focus special attention on the MVP design pattern. To see his scheme can be, for example, (MVP Wiki). In order to interest the %username% will result in a screenshot app, which I eventually did.
Yes, I understand that the app does nothing useful, but based on it I will try to show how to divide the architecture into separate independent parts (mail, contacts and tasks, by the way, taken just from the ceiling), to organize the switching and the relationship between them using the built-in GWT 2.1 mechanisms. In addition, it considered the M-component of the MVP-pattern, i.e., the model given in the Appendix for illustrative purposes, there is no data binding.
the
the Main components of the embedded MVP
The GWT team suggested the following key components for building an application using MVP:
the
Activity — the classical approach is the Presenter. Responsible for logic open at the moment. Does not contain any GWT widgets or associated with the UI code. But, in turn, has an associated view object (view). Starts and stops automatically using ActivityManager-
ActivityManager — the built-in object that manages the lifecycle of Activities, it was
Place — responsible for the state of the current view. Basically, view state is transmitted with the use of URLS (for example, to open a contact with ID=<so-> edit) or else, history-tokens. Thanks to the object PlaceHistoryHandler that “listens” for changes in the browser address bar can be re-created the desired state of the object Place. When re-creating or saving the state of an object is used PlaceTokenizer Place-the object whose methods are called when the re-establishment and persistence of the described object
PlaceHistoryMapper, ActivityMapper classes-mappers, which are in fact responsible for the registration of all Place s and Activity'her application. ActivityMapper also based on passed object Place (which in turn was recreated from history-token) decides which Activity will be associated with the corresponding state of the URL
View — a simple Composite widgets that can contain other nested widgets. Contain the associated instance of the presenter (activity). Contain no logic except the logic needed for UI needs, for example, switching styles, etc. all useful logic views delegate associated to the presenter by calling its methods.
Let us now consider in more detail all these components separately on the example of real code. By the way, the application code is available for free access. So it is possible to peep as you read.
the
Visual component, or View
First and foremost is to say that MVP decided to “share” between the presenter and view interfaces only. Therefore, for each type in the application has a corresponding interface
the
package com.gshocklab.mvp.client.mvp.view;

import com.google.gwt.user.client.ui.IsWidget;

public interface IMailView extends IsWidget {
public void setPresenter(presenter IMailPresenter);

public interface IMailPresenter { }
}
In the interface view describes the corresponding interface of the presenter that will carry the entire payload (sending queries, retrieving data, handling events from the event bus, etc.).
The implementation of this interface will be simple and should not cause any special issues.
the
public class MailView extends Composite implements IMailView {
interface MailViewUiBinder extends UiBinder < Widget, MailView> { }
private static MailViewUiBinder uiBinder = GWT.create(MailViewUiBinder.class);

private IMailPresenter presenter;

public MailView() {
initWidget(uiBinder.createAndBindUi(this));
}

@Override
public void setPresenter(presenter IMailPresenter) {
this.presenter = presenter;
}
}
The associated ui.the xml file contains only one widget, a Label with plain text. To bring him code makes no sense, it can be viewed on the project website.
That's all for the View part. We now turn to the more interesting, to Activity.
the
Logic pages (types) or Activity
In the demo app, on the left there is a navigation bar with links. When someone clicks on these link, you can switch between views and set the CSS style for the current link. This action I made in the abstract parent class AbstractMainActivity, which is the successor of the built-in class AbstractActivity
the
package com.gshocklab.mvp.client.mvp.activity;

public abstract class AbstractMainActivity extends AbstractActivity {
private static Map<String Element> navLinks = new LinkedHashMap<String Element>();
static {
navLinks.put(AppConstants.MAIL_LINK_ID, DOM.getElementById(AppConstants.MAIL_LINK_ID));
navLinks.put(AppConstants.CONTACTS_LINK_ID, DOM.getElementById(AppConstants.CONTACTS_LINK_ID));
navLinks.put(AppConstants.TASKS_LINK_ID, DOM.getElementById(AppConstants.TASKS_LINK_ID));
}

public void applyCurrentLinkStyle(String viewId) {
for (String linkId : navLinks.keySet()) {
final Element link = navLinks.get(linkId);
if (link == null) continue;
if (linkId.equals(viewId)) {
link.addClassName("b-current");
} else {
link.removeClassName("b-current");
}
}
}
}
And a concrete implementation of a specific Activity
the
package com.gshocklab.mvp.client.mvp.activity;

public class extends implements MailActivity AbstractMainActivity IMailView.IMailPresenter {
private ClientFactory clientFactory;

public MailActivity(ClientFactory clientFactory) {
this.clientFactory = clientFactory;
}

@Override
public void start(AcceptsOneWidget container, EventBus eventBus) {
applyCurrentLinkStyle(AppConstants.MAIL_LINK_ID);

final IMailView view = clientFactory.getMailView();
view.setPresenter(this);
container.setWidget(view.asWidget());
}
}
How it works: ActivityManager upon receipt of the change events URL from PlaceHistoryManager creates with the help of ActivityMapper-a target instance Activity and launches it for execution using the start () method. In this method one of the parameters passed to the container in which the widget will be inserted. The view we get from the ClientFactory, which will be a little lower. In the instance we injecton presenter and execute the view as a widget. Yes, still set a CSS rule for the link that leads to the current view. But this is a purely visual design.
ClientFactory is a simple factory that creates the desired objects. Its interface is described in the following way
the
public interface ClientFactory {
public EventBus getEventBus();
public PlaceController getPlaceController();

public IMailView getMailView();
public IContactsView getContactsView();
public ITasksView getTasksView();
}
Its implementation is not characterized by the “intelligence and wit”.
the
public class ClientFactoryImpl implements ClientFactory {
private final EventBus eventBus = new SimpleEventBus();
private final PlaceController placeController = new PlaceController(eventBus);

private final IMailView mailView = new MailView();
private final IContactsView contactsView = new ContactsView();
private final ITasksView tasksView = new TasksView();

@Override public EventBus getEventBus() { return eventBus; }
@Override public PlaceController getPlaceController() { return placeController; }
@Override public IMailView getMailView() { return mailView; }
@Override public IContactsView getContactsView() { return contactsView; }

}
Instantiate the object ClientFactory will be performed using Deffered binding'and according to the rule, which is described in the description file GWT module. But more on that again later in the section, which will review the configuration of all MVP-farms in a single working system. It is worth noting that in real projects for tasks ClientFactory better to use Google GIN Ohm. The dignity of the DI-tool cannot be described there, they are so clear.
The last key element of the embedded MVP is an object that is responsible for the state of the UI and performs manipulations with history tokens.
the
Place or hash-URLS and processing
As mentioned above, the object Place is responsible for the current state of the UI. The condition is transmitted through the URL, through history tokens. In fact, in this object you can store the parameters that are passed with a hash URL Oh. The state of the URL is encoded/decoded using object Tokenizer'. When working with query parameters that are passed in the hash of URL e is very important to maintain the following rule: all parameters that we “come” from the URL after the processing in the same form encoded in the URL ago. It is this logic implemented in the methods of the Tokenizer.
Under the agreement, which was adopted by the GWT team and is described in the official manual class tokenizer usually described as an internal static class of the object Place. This simplifies the code to save the variables in Place of query parameters. Although it is possible to apply the approach with separate classes for tokenizers.
Not to be unfounded let's consider the code class MailPlace
the
package com.gshocklab.mvp.client.mvp.place;

import com.google.gwt.place.shared.Place;
import com.google.gwt.place.shared.PlaceTokenizer;
import com.google.gwt.place.shared.Prefix;

public class MailPlace extends Place {
private static final String VIEW_HISTORY_TOKEN = "mail";

public MailPlace() { }

@Prefix(value = VIEW_HISTORY_TOKEN)
public static class Tokenizer implements PlaceTokenizer<MailPlace> {
@Override
public MailPlace getPlace(String token) {
return new MailPlace();
}

@Override
public String getToken(place MailPlace) {
return "";
}
}
}
This class takedown from the built-in class Place. It a constant is declared part of the hash URL, which will uniquely identify the state. In this case, the “mail”. For the reconstruction of the state and its preservation through history tokens responding to the Tokenizer. The specific binding of the hash URL to tokenizer using the annotate Prefix.
Treatment of history in General, an interesting topic and deserves a separate article. Here let it suffice to say that every object will be connected Place their own hash URL. This URL must end with “:”. After this colon, you can specify additional parameters, for example, you can generate an URL #mail:inbox #contacts:new etc. and these tokens will be processed in the method getPlace(). In fact, the first part of the hash URL is the determinant of the subsystems (mail, tasks etc.), everything after the colon can be regarded as the action s of the subsystem.
In the demo project more tokens (or actions) are not used, so the method getToken() in all tokenizer returns an empty string, and the method getPlace() returns the created object Place.
the
the definition of the desired Activity and check in handlers
When entering a new URL and successful instanciate object Place ActivityManager Manager with ActivityMapper'and decides on which object a presenter need to run. The definition is implemented simply and is banal.
the
public class DemoActivityMapper implements ActivityMapper {
private ClientFactory clientFactory;

public DemoActivityMapper(ClientFactory clientFactory) {
super();
this.clientFactory = clientFactory;
}

@Override
public Activity getActivity(Place place) {
if (place instanceof MailPlace) {
return new MailActivity(clientFactory);
} else if (place instanceof ContactsPlace) {
return new ContactsActivity(clientFactory);
} else if (place instanceof TasksPlace) {
return new TasksActivity(clientFactory);
}
return null;
}
}
Register handlers hash URLS, i.e. tokenizer is performed in the interface PlaceHistoryMapper
the
package com.gshocklab.mvp.client.mvp;

import com.google.gwt.place.shared.PlaceHistoryMapper;
import com.google.gwt.place.shared.WithTokenizers;
import com.gshocklab.mvp.client.mvp.place.ContactsPlace;

import com.gshocklab.mvp.client.mvp.place.TasksPlace;

@WithTokenizers({MailPlace.Tokenizer.class, ContactsPlace.Tokenizer.class, TasksPlace.Tokenizer.class})
public interface DemoPlaceHistoryMapper extends PlaceHistoryMapper { }
All that is needed at this stage is just to list in the annotation @WithTokenizers classes tokenizer application.
the
putting it all together
All the code for initialization and starting of the mechanism of the MVP framework is assembled in the onModuleLoad () method EntryPoint'and
the
package com.gshocklab.mvp.client;

import com.google.gwt.activity.shared.ActivityManager;
import com.google.gwt.activity.shared.ActivityMapper;
import com.google.gwt.core.client.EntryPoint;
import com.google.gwt.core.client.GWT;
import com.google.gwt.event.shared.EventBus;
import com.google.gwt.place.shared.PlaceController;
import com.google.gwt.place.shared.PlaceHistoryHandler;
import com.google.gwt.user.client.History;
import com.google.gwt.user.client.ui.RootLayoutPanel;
import com.google.gwt.user.client.ui.SimplePanel;
import com.gshocklab.mvp.client.layout.AppLayout;
import com.gshocklab.mvp.client.mvp.DemoActivityMapper;
import com.gshocklab.mvp.client.mvp.DemoPlaceHistoryMapper;
import com.gshocklab.mvp.client.mvp.place.MailPlace;

public class MvpInActionEntryPoint implements EntryPoint {
private SimplePanel containerWidget;
private MailPlace defaultPlace = new MailPlace();

@Override
public void onModuleLoad() {
final AppLayout mainLayout = new AppLayout();
containerWidget = mainLayout.getAppContentHolder();

final ClientFactory clientFactory = GWT.create(ClientFactory.class);
EventBus eventBus = clientFactory.getEventBus();
PlaceController placeController = clientFactory.getPlaceController();

// activate the activity manager and init display
ActivityMapper activityMapper = new DemoActivityMapper(clientFactory);
ActivityManager activityManager = new ActivityManager(activityMapper, eventBus);
activityManager.setDisplay(containerWidget);

// display default view with activated history processing
DemoPlaceHistoryMapper historyMapper = GWT.create(DemoPlaceHistoryMapper.class);
PlaceHistoryHandler historyHandler = new PlaceHistoryHandler(historyMapper);
historyHandler.register(placeController, eventBus, defaultPlace);

RootLayoutPanel.get().add(mainLayout);

History.newItem("mail:");
}
}
I think code explanations are superfluous, everything is simple and clear. It should be noted that the call History.newItem(“mail:”) is unnecessary. MailActivity and so to start, because as a default Place and set MailPlace. Another thing is that at the start we will not see in the browser address bar hash URL #mail:. If the display start hash-URL for the project is not critical to the call History.newItem() can be removed.
To built-in MVP framework work to connect the corresponding GWT module in a description file GWT module (gwt.xml file)
the
<?xml version="1.0" encoding="UTF-8"?>
<module rename-to='mvpinaction'>
<inherits name='com.google.gwt.user.User' />
<inherits name="com.google.gwt.activity.Activity"/>
<inherits name="com.google.gwt.place.Place"/>

<entry-point class='com.gshocklab.mvp.client.MvpInActionEntryPoint' />

<replace-with class="com.gshocklab.mvp.client.ClientFactoryImpl">
<when-type-is class="com.gshocklab.mvp.client.ClientFactory" />
</replace-with>

<source path='client' />
</module>
Here you specify the rule deferred binding'and to create a ClientFactory instance.
the
in conclusion
That's all. File with a root layouta application AppLayout I do not give, you can look in the source code. In this file there are links, href attributes that specify the hash URLS to navigate to the application subsystems. To open a particular subsystem by simply typing in the browser address bar the correct URL. Automatically starts the process of converting the state from the URL in the appropriate place with the launch of the relevant activity, which will display the desired view.
Notice additionally that in the article and demo project were not are treated as important in life momena, as the use of bus events (eventBus), processing options hash URLS and much more.
Working demo project, source code Google Code. Carefully, Mercurial!
Waiting for feedback and comments.
PS Sorry for Megabucks. I hope that this introductory note was useful to someone (though not fully illuminate the full power of the built-MVP), I'm not vain wrote it, and it will serve as a starting point when implementing a really cool GWT-applications


Комментарии
Отправить комментарий